Steam Deck edition
Tea for the Steam Deck — installing, where files live, launching games, buttons, the in-game quick menu, updating and uninstalling, and how it differs from Android
Tea also comes in a Steam Deck edition (Freedeck Go). It has the same version number and interface as the Android edition: the library, cartridge and disc labels, the launch animation, theme backgrounds, Cloud drive, Utility, cheats, AI features and save sync are all there. Play straight from Game Mode with the controller, or swipe on the touchscreen.
#Getting it
The Steam Deck edition is currently for supporters only; see the download page for how to get it.
#Installing
Install it in Desktop Mode.
Switch to Desktop Mode: press the Steam button → Power → Switch to Desktop.
Put the downloaded archive (
freedeck-go-tea-version-linux-x64.zip) in your Downloads folder.Open Konsole (application menu in the bottom-left corner → System → Konsole) and type:
cd ~/Downloads && unzip -o freedeck-go-tea-*-linux-x64.zip && bash freedeck-go/install.shRather not type? In the Dolphin file manager, right-click the archive → Extract → Extract archive here, go into the
freedeck-gofolder, press F4 (or right-click an empty spot → Open Terminal Here), typebash install.shand press Enter.When the installer asks "Close Steam now?", just press Enter: Steam's game list can't be changed while Steam is open, and Steam reopens automatically afterwards.
Go back to Game Mode (Return to Gaming Mode on the desktop) and launch Tea from Non-Steam in your library.
The installer:
- installs Tea to
~/Applications/freedeck-go; - adds Tea to Games in the Desktop Mode application menu;
- adds Tea to Steam as a non-Steam game, with an icon, cover and banner (images you've changed yourself in Steam aren't overwritten).
Note Run the installer in Desktop Mode. In Game Mode it can't close Steam, so it only installs the app; you'll need to run it again in Desktop Mode to get the Steam shortcut.
Leave Steam's controller and touchscreen settings at their defaults; there's nothing to change. Only one Tea runs at a time.
#Manual install (if the one-step install doesn't work)
- In Dolphin in Desktop Mode, open your home folder (
/home/deck). If there's noApplicationsfolder, create one, then extract the archive into it so you get/home/deck/Applications/freedeck-go/. Don't name itFreedeckGo(that's the folder for settings and images). - Open Steam on the desktop → Add a Game in the bottom-left corner → Add a Non-Steam Game → Browse…, set the file type to All Files, choose
freedeck-go.shin thefreedeck-gofolder → Add Selected Programs. - For an icon: right-click it in your Steam library → Properties → click the icon and choose
icon.pngfrom the same folder. You can rename it to Tea.
If it won't start, right-click freedeck-go.sh → Properties → Permissions → tick Is executable.
#First launch
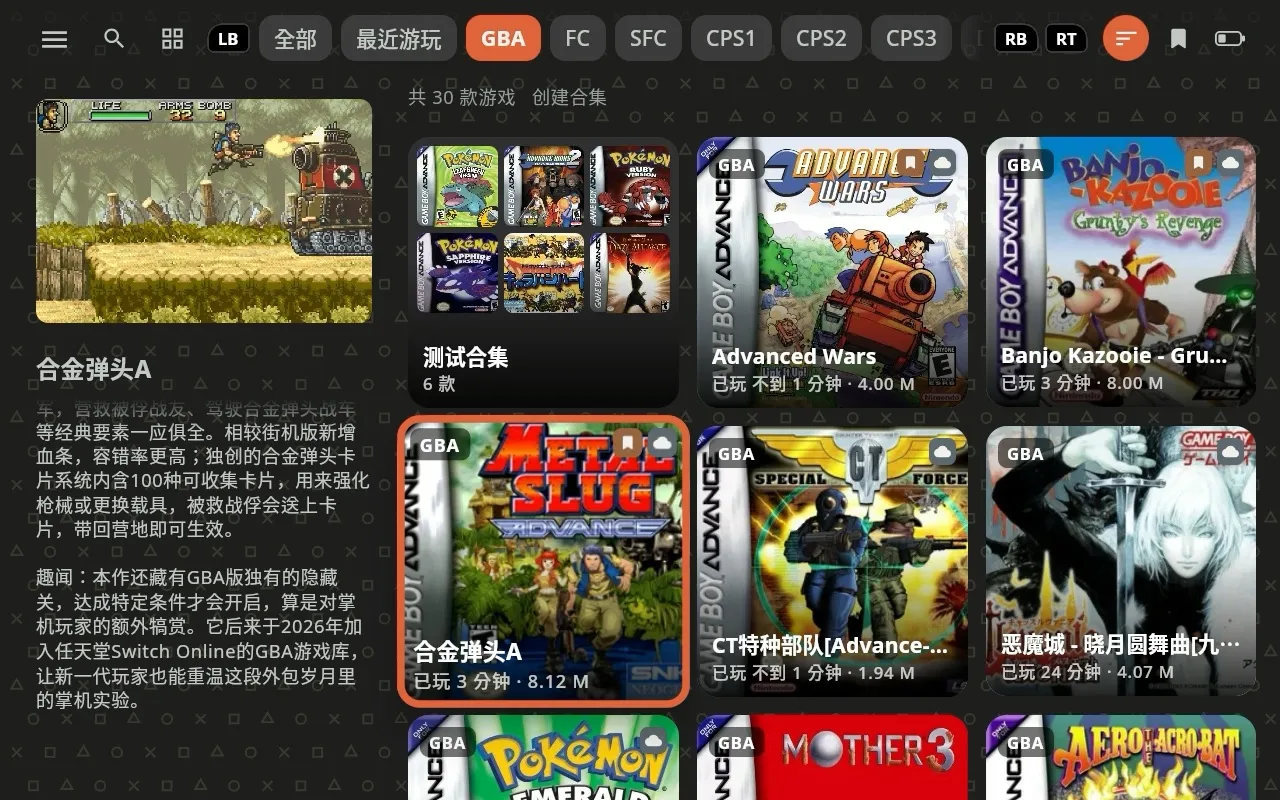
The first time you launch it, Tea asks you to:
- Choose a language.
- Choose your ROM folder: with EmuDeck installed, it finds
~/Emulation/romsautomatically; without it, tap Create ROM folder to createEmulation/romsand a subfolder for each console, then put games in the matching subfolder. - Log in to ScreenScraper (optional, for scraping covers and info; see Covers and labels).
Install emulators in one tap from Utility, or use the Setup wizard to pick your consoles, install emulators and set up bezels and shaders all at once; see Utility.
#Where files live
| Location | Contents |
|---|---|
~/Applications/freedeck-go |
The app itself |
~/FreedeckGo |
Settings, bookmarks, covers, labels and images you can share with the Android edition; cloud drive downloads also go to downloads here first by default |
~/.local/share/freedeck-go |
This device's settings, cover cache, cloud drive logins and logs |
~/Emulation/roms (the EmuDeck / ES-DE ROM folder) |
Games, in a subfolder per console (gba, psx, ps2…) |
~/FreedeckGoholds the same things as theFreedeckfolder on an Android handheld: copy it over from the handheld and it just works, and the other way round too. Folder paths you chose on the handheld don't exist on the Deck, so choose the ROM folder again on the Deck.- Tea also looks for ROM folders on the SD card (
Emulation/roms), and in~/ROMs,~/romsand~/ES-DE/ROMs. - Folder names match ES-DE: several folders for the same console (like
megadriveandgenesis) are merged into one tab; ES-DE'smameandarcadefolders automatically become a separate arcade tab.
#Cloud drive and downloads
In Settings → General → Library drive, log in to 天翼云盘 (China Telecom Cloud), 百度网盘 (Baidu Netdisk) or 夸克网盘 (Quark): a QR code appears on screen; scan it with your phone. Then browse your own cloud drive files under Cloud drive in the side menu, tap Download once you've picked, and choose which console to download to (or Other folder).
When a download finishes, the game is installed into that console's ROM folder automatically, and archives are extracted automatically. Nothing downloads while Tea is closed; it carries on next time you open it. See Cloud drive and downloads.
#Launching games
Tap Play and Tea launches the game the same way ES-DE on this device would: the same emulator rules, looking for emulators in the same places.
- With EmuDeck: emulators and the ROM folder are found automatically; just play.
- Without EmuDeck: install emulators from Utility (from Flathub or official AppImages), or from the Discover store in Desktop Mode.
- The emulator row on a game's page (or Y) lists the emulators and cores this console can use — only mainstream, still-maintained ones. Ones that can't be found are greyed out with what's missing. Missing RetroArch cores are marked " (installs when picked)"; pick one and it downloads automatically.
- With nothing installed, tapping Play tells you which emulator ES-DE would use and what's missing.
- On networks in mainland China, installing from Flathub automatically uses a mirror in China, and shows how much has downloaded and how fast. System-wide Flatpak emulators are updated in Discover.
Before launching, Tea takes care of a few things for you:
- RetroArch games always start full screen, so bezels line up.
- PS2: PCSX2's controller 1 is hooked up to Steam's controller automatically. Switch: Eden's buttons are mapped to the Deck's controls automatically the first time it starts. Buttons you've set yourself aren't changed.
- For Nintendo console games, you can switch between Default layout / Nintendo layout / Xbox layout next to Emulator on the game's page. Besides RetroArch cores, Eden, Azahar, melonDS, mGBA, Cemu and Ryujinx support it too.
Play time is recorded as usual, including when you quit with Steam's "Exit game".
#Buttons
Tea reads the controller through Steam Input; keep Steam's default controller settings.
| Button | Action |
|---|---|
| A / B | Confirm / back |
| Select | Open the side menu |
| LB / RB | Switch tabs |
| Start | Switch between grid / list / carousel |
| Y | Search |
| LT + B | Open "Customise" (theme, background, cover shape, grid columns) |
| Hold Select + Start for about 1 second in game | Close the running emulator and go back to Tea |
| L4 + R4 in game | Open the quick menu (see below) |
The touchscreen works too: tap, swipe and long-press just like on a handheld.
RetroArch hotkeys: if RetroArch has no controller hotkeys set up yet (say, without EmuDeck, or freshly installed from Flathub), Tea sets up the same ones EmuDeck uses:
| Button | Action |
|---|---|
| Hold Select + Start | Quit |
| Hold Select + R1 / L1 | Quick save / quick load |
| Hold Select + X (or L3 + R3) | Open the RetroArch menu |
| Hold Select + R2 | Fast-forward |
| Hold Select + D-pad left / right | Switch save slot |
For games on 2D consoles like the NES, SNES, GBA and Mega Drive, the left stick works as a D-pad too. Existing RetroArch settings (EmuDeck's or your own) aren't changed.
#In-game quick menu
While playing in Game Mode, press L4 + R4 and a quick menu slides in on the right of the screen (like the floating button on Android). While it's open, the game doesn't receive button presses.
- LB / RB switch pages, the D-pad moves up and down, A selects, and B or L4 + R4 again closes it.
- Actions: Hide, Save, Save+quit, RA menu, Quit (Quit works with any emulator; the rest are for RetroArch).
- Bezels / Shaders: RetroArch games only. Lists the bezels or shaders available for this console, with the one in use marked Current; choose None to turn it off. After you choose, it shows "Applying…" and the menu closes by itself when done. The setting applies to every game on this console and is the same one as in Utility.
- Changing the shader usually takes effect right away.
- Changing the bezel needs the game to reload: Tea first saves to your current quick save slot, restarts the game and loads it back so you carry on playing, and your original quick save file is put back as it was. YabaSanshiro doesn't support quick saves, so after changing the bezel the game starts from the beginning.
#Save sync
The Steam Deck and Android handhelds can share the same Sync drive: the latest saves are pulled before a game starts and uploaded after you quit. In-game saves work on both, so you can carry on on another device; quick saves stay on each device (the emulator versions differ, so they can't read each other's).
- PS2: NetherSX2, ARMSX2 and PCSX2 on the Deck share the same saves. Saves for PS2 games in CHD format don't sync yet; use ISO if you want them synced.
For setup, see Saves and cloud sync.
#Updating
- Open Settings → General and tap Check for updates on the version card at the bottom.
- When there's a new version it shows "Latest" with the version number; tap Update to download (check Release notes first to see what's new).
- When it shows "… is ready: restart to finish", tap Restart to update. Tea closes, finishes updating and opens again.
Your settings and data are kept. If it shows "no Steam Deck build yet", the latest version doesn't have a Steam Deck update yet; check again later.
#Uninstalling
In Konsole in Desktop Mode, run:
bash ~/Applications/freedeck-go/install.sh --uninstall
This removes the app, Tea from the application menu and the Steam shortcut, and keeps your settings and data (~/.local/share/freedeck-go and ~/FreedeckGo). To remove the settings and data too:
bash ~/Applications/freedeck-go/install.sh --uninstall --purge
If you installed it manually: remove Tea in Steam, then delete the freedeck-go folder.
#How it differs from Android
| Android | Steam Deck | |
|---|---|---|
| Launching games | Tea's own emulator list | ES-DE's emulator rules, with EmuDeck, Flatpak and AppImage support |
| In-game menu | Floating button | L4 + R4 quick menu |
| Custom launch (including AI Generate) | Yes | No |
| Android apps, PC game launchers (GameHub, GameNative, DroidDeck, etc.) | Yes | No |
| Home NAS | Yes | Not yet |
| Bezels | Every bezel Utility offers | Only bezels that fit the Deck's screen (16:10) |
| Save sync | Between Android devices, both in-game saves and quick saves sync | With Android, only in-game saves are shared; quick saves stay on each device |
| Updating | Settings → General → Check for updates | The same, then tap Restart to update to finish |