Playing games
Play from the game page: choosing emulators and cores, button layouts, multi-disc games, BIOS, PS Vita, PC games, the floating button and play time.
#Start a game
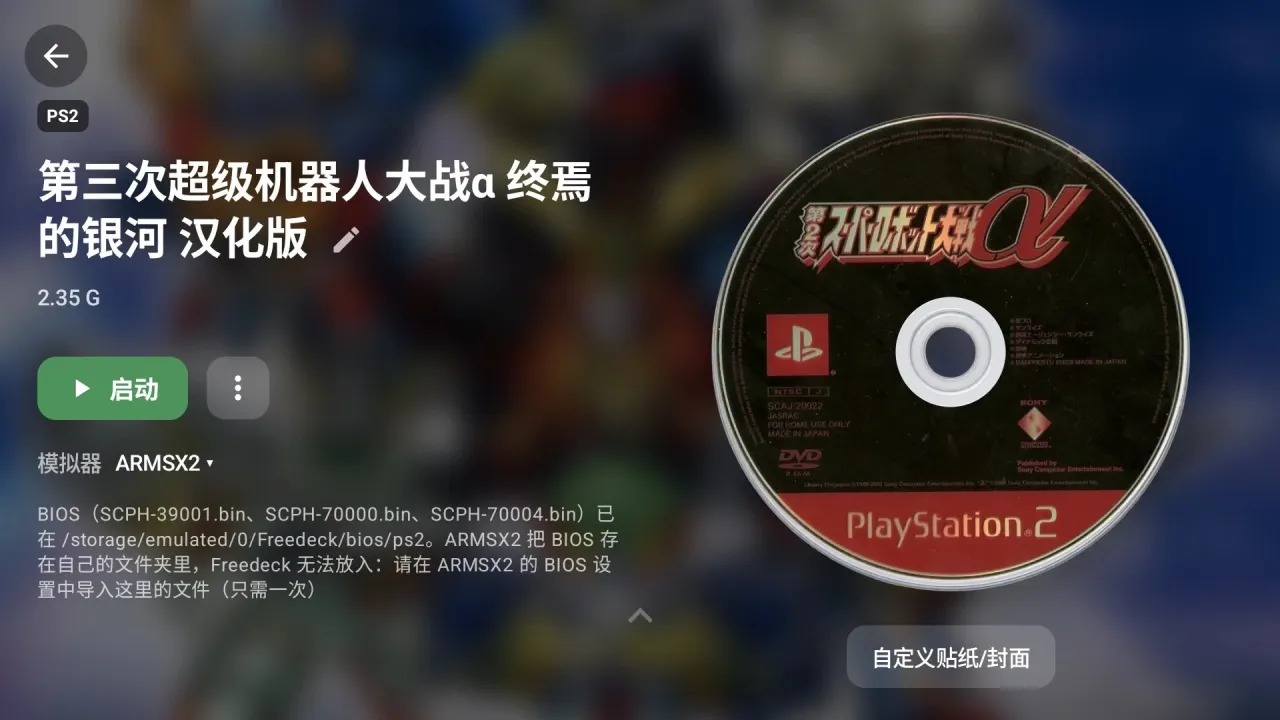
- Pick a game in the Library to open its game page.
- Play is already selected; press A to start.
- When you're done, quit the emulator normally to return to Tea.
Want A in the Library to start the game straight away, skipping the game page? Turn on Quick launch game under Settings → Interface: from then on A / a tap plays the game and LT + A shows details; a long press on a game always opens details.
The Play button shows the current emulator. It may instead read:
- Install an emulator: none of the emulators for this console is installed. Tap it to install one in Utility (see Utility).
- Open emulator name: this emulator can't be handed a game, so it just opens and you pick the game inside it (for example 3DS
.ciainstall packages, see below).
Tip: for games with save sync on, Tea gets the latest save ready in the background as soon as you open the game page, so Play starts right away. See Save sync.
#Choose an emulator and core
Open Choose emulator from the Emulator row on the game page (or press Y):
- It lists every emulator this console supports, in recommended order; the first is marked Recommended. Emulators you haven't installed are marked Not installed and can't be picked.
- RetroArch gets one row per core.
- Emulators or cores marked Cheats support cheats.
- The window doesn't close by itself after you pick; tap Done to close it.
What a choice applies to:
| Action | Effect |
|---|---|
| Pick one directly | This game only |
| Apply to all | Every game for this console (FC and NES, SFC and SNES count as the same console) |
| Apply to this tab | Only for games opened from a custom tab: every game in that tab uses it; the main tabs aren't affected |
Between a single game's choice and Apply to all, whichever you set last wins.
Install in Utility appears in the window only when none of the usable emulators is installed.
#RetroArch cores
- Tea can't see which cores the official RetroArch has already downloaded. After you pick a core, the game page reminds you: if the core isn't downloaded yet, in RetroArch go to Load Core → Download a Core. If it's already installed, ignore the reminder.
- RetroArch G (the RetroArch bundled with many handheld firmware packs) is listed separately and shows only its built-in cores, with nothing to download.
- Want a core that isn't in the list? Below RetroArch and RetroArch G there's an Other cores… row that opens every core available for this console, with search. Your pick is remembered.
- FinalBurn Neo Plus (arcade) isn't an official RetroArch core and isn't in Download a Core. When you pick it, the game page tells you in yellow to install it by hand first; just follow the steps shown.
- Sensor cartridges (such as Boktai, WarioWare: Twisted! and the GB tilt cartridge Kirby Tilt 'n' Tumble) always run in mGBA; other cores without sensor support are greyed out and marked No sensor support.
#Emulators for common consoles
The table follows the order in the choose window; the first is recommended. Entries marked "(core)" are RetroArch cores.
| Console | Emulators |
|---|---|
| GB / GBC | Gambatte, SameBoy, Gearboy, mGBA (core) |
| GBA | mGBA, VBA-M, gpSP (core), My Boy! (if installed) |
| FC / NES | FCEUmm, Nestopia UE, Mesen (core) |
| SFC / SNES | Snes9x, Snes9x 2010, bsnes (core) |
| MD / Mega CD | Genesis Plus GX, PicoDrive (core) |
| Game Gear | Genesis Plus GX, Gearsystem (core) |
| PC Engine / PCE CD | Beetle PCE FAST, Beetle PCE (core) |
| Saturn | YabaSanshiro, Beetle Saturn (core), Yaba Sanshiro 2 (if installed) |
| Arcade (Neo Geo, CPS1–3, FBNeo) | FinalBurn Neo, FinalBurn Neo Plus, MAME 2003-Plus, MAME (Arcade), MAME, MAME 2003 (core), MAME4droid |
| NAOMI | Flycast (core), Flycast |
| DC | Flycast, Flycast (core) |
| N64 | M64Plus FZ, Mupen64Plus-Next, ParaLLEl N64 (core), M64Plus FZ Pro (if installed) |
| PS1 | PCSX ReARMed (core), DuckStation, SwanStation, Beetle PSX HW (core) |
| PS2 | ARMSX2, NetherSX2 |
| PS3 | ARMSX3 |
| PSP | PPSSPP, PPSSPP (core) |
| PS Vita | Vita3K, Vita3K+, Vita3K (core) |
| NDS | melonDS, WatermelonDS, DraStic, melonDS DS (core) |
| 3DS | AzaharPlus, Citra-MMJ, Citra (天马包, Pegasus pack), Lime3DS (if installed) |
| GameCube / Wii | Dolphin, Dolphin MMJR2-VBI |
| Wii U | Cemu, Cemu (core) |
| Switch | Eden, Lemon, Eden Nightly, STORM SWITCH (if installed) |
| PC | GameNative, GameHub Lite, WinNative, DroidDeck |
Emulators marked "(if installed)" can't be downloaded in Utility; they show up in the list only if you've installed them yourself.
Tip: for PS1, PCSX ReARMed is recommended: it runs smoothly even on low-end handhelds and needs no BIOS. To use DuckStation instead, pick it once on the game page.
#Custom launch
At the bottom of the choose window is Custom launch: any app on the device can launch games, and you can also give a supported emulator a different launch method (except RetroArch and RetroArch G).
- Tap Custom launch and pick an app from the list (press Y to search).
- Enter a command in the Command window. If you know ES-DE or 大鸡手 (Daijishou), you can paste their launch arguments as they are. Not sure what to write? Tap ✦ Generate and let the AI write it (an AI feature, see AI features).
- Tap Try, and when you're back in Tea answer Did the game start?: choose yes to save it; if it didn't start, edit the command, or tap Generate again for another way.
- Some apps don't accept games from outside: choose Open app only, then pick the game inside the app.
Commands are saved per app and console, and with sync on they follow you to your other devices. Tap Remove when you no longer need one.
Games started with a custom launch still record play time, but get no save sync, cheats or floating button.
#Button layout
RetroArch treats the right-hand button as A by default. For Nintendo consoles you can make the button printed A on your controller be A in the game:
- Open the game page of an FC, SFC, GB, GBC, GBA, NDS, 3DS, Switch or Wii U game and pick a RetroArch core.
- A button layout row appears under Emulator; tap it to cycle: Default layout → Nintendo layout → Xbox layout.
- It takes effect the next time you start the game.
- The choice is saved per core, so every game on that core follows it.
- Switch back to Default layout and your original RetroArch button settings come back untouched.
- The Steam Deck edition also supports standalone emulators such as Eden, Azahar and melonDS; see Steam Deck.
#Multi-disc games
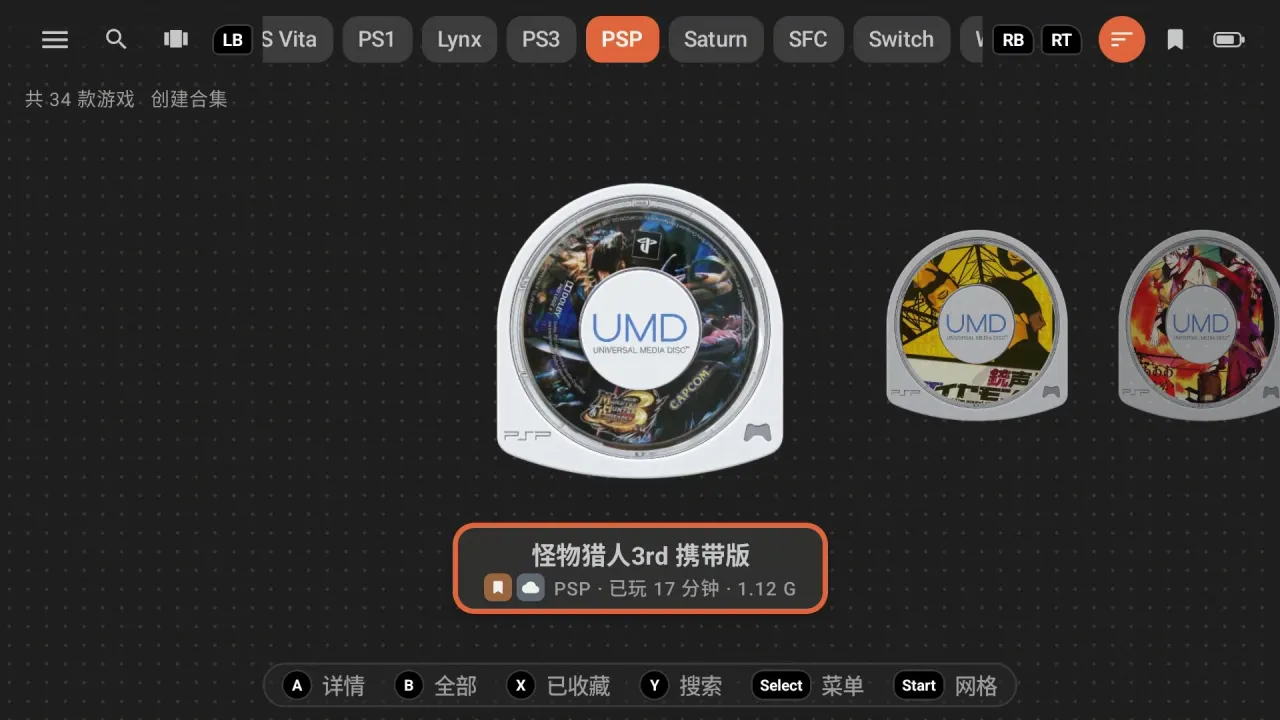
- A game's discs are merged into one game in the Library.
Disc 2,CD2,盘2,碟2and第2张in file names are all recognised.
#Playing in RetroArch (PS1, Mega CD, Saturn, DC, PCE CD)
Tea creates a playlist (.m3u) in the game folder automatically and starts from it, so all discs share one memory card.
- With the floating button on (needs the universal RetroArch nightly): tapping Play opens Choose a disc. Continue where you left off loads your quick save as usual; pick Disc 2 to start straight from the second disc. In a game, swap discs with the floating button's Swap disc.
- With the floating button off: swap discs in RetroArch's Quick Menu → Disc Control.
- While the game is still running in RetroArch, tapping Play again goes straight back to it without asking for a disc.
Note: only swap discs when the game asks you to. Swapping at any other time freezes the game.
#Playing in other emulators
- DuckStation: change discs from its pause menu.
- Other emulators: tapping Play asks which disc you want first.
#BIOS
You don't need to worry about most BIOS files: missing ones are downloaded automatically when you open the game page or tap Play. For PS1, Saturn and Mega CD, the Japanese, US and European versions are all fetched at once, so Japanese games and fan translations won't fail to start because of a region mismatch.
#RetroArch cores (put in place automatically)
| Console | Cores that need a BIOS |
|---|---|
| PS1 | SwanStation, Beetle PSX HW (PCSX ReARMed can do without, but it's provided too) |
| Saturn | Beetle Saturn |
| Mega CD | Genesis Plus GX, PicoDrive |
| 3DO | Opera |
| PCE CD | Beetle PCE FAST, Beetle PCE |
| Lynx | Handy, Beetle Lynx |
FC Disk System (.fds) |
FC cores |
| GBA, NDS, DC | Not required, but the same files are provided so quick saves load across devices |
| PSP | Fonts for the PPSSPP core; without them games show no text |
| PS Vita | System firmware for the Vita3K core |
| PGM arcade | pgm.zip next to the game |
Everything goes into RetroArch's system folder with nothing for you to do. If a download fails, the game page tells you which file is missing and where it goes.
#Standalone emulators (import once)
Tea can't put files into these emulators' BIOS folders, so their BIOS is downloaded into bios/<console>/ in the Freedeck folder:
| Emulator | Folder | How to use it |
|---|---|---|
| DuckStation | bios/ps1 |
Import it in the emulator's BIOS settings (once) |
| ARMSX2, NetherSX2 | bios/ps2 |
Same as above; US, Japanese and European versions are all there |
| melonDS, WatermelonDS | bios/nds |
Pick these files in the BIOS options of the emulator's settings |
| Vita3K, Vita3K+ | bios/psv |
In the emulator, install firmware with PSVUPDAT.PUP, then install the font package PSP2UPDAT.PUP |
| MAME4droid | bios/mame |
On first launch choose external storage, then this folder |
In Utility, these emulators' cards have a BIOS row that says where the files are. The game page tells you too; once you've read it, tap Got it at the end and it won't show again (it stays on the card).
Note: Switch, 3DS and Wii U keys and the PS3 firmware aren't downloaded automatically. Get them yourself and import them as the emulator's instructions say.
#PS Vita
PS Vita games can use Vita3K, Vita3K+ (an experimental fork) or RetroArch's Vita3K core.
#With Vita3K / Vita3K+
Vita3K only accepts games already installed in its storage folder. Recommended steps:
- In Vita3K's settings, change its storage folder to a folder on the SD card or internal storage (such as
Vita3K). Tea usually finds it by itself; if not, tap Choose under Utility → Vita3K card → Vita3K's storage folder. - Install the firmware in Vita3K (see the BIOS table above).
- Back in Tea, tap Play: the first start moves the game into Vita3K, and later starts open it directly. A
.psvitafile is left next to the game so other front ends can use it too.
- Android 14 and later: if Vita3K was already running in the background, it may not see the game that was just moved in. Tap Refresh in Vita3K's menu (⋮), then open the game.
- If the storage folder is left at its default location, the game page shows Pack as zip: it packs the game into a package Vita3K can install directly, saved in
Download/Vita3K/. After installing it once in Vita3K you can delete the zip. - Games installed in Vita3K show up in the Library automatically. ES-DE
.psvitaand 大鸡手 (Daijishou).dptindex files placed in the PS Vita ROM folder also become games you can start directly. - Deleting a game also deletes the game, updates and DLC moved into Vita3K; saves are kept.
#With RetroArch's Vita3K core
It reads the game files where they are, with nothing moved. Firmware is downloaded automatically. Quick saves aren't supported.
#3DS .cia install packages
AzaharPlus, Citra-MMJ and similar emulators can't run a .cia directly. For these games the button reads Open emulator name: install it once in the emulator via Menu → Install CIA, then run it from the emulator's game list. Formats like .3ds and .cci start directly.
#Folder access hints
Some emulators (for example DuckStation with .cue discs, NetherSX2 and newer DraStic) can only open a game if you've added its folder in the emulator. When that's missing, the game page tells you in yellow that the emulator needs the folder added as a game folder in its settings; just add that folder in the emulator.
#PC games
PC games run in GameNative, GameHub Lite, WinNative or DroidDeck, and must be added in those apps first. Set where PC games are stored under Settings → PC games.
| App | How to get one-tap Play |
|---|---|
| GameNative | Add the game's folder in GameNative once, then Play starts the game directly. Its custom games, and Steam / Epic / GOG / Amazon games exported with its Frontend Sync (exporting to gamenative in the ROM folder is recommended), are listed in the Library automatically |
| GameHub Lite | Tap Allow once on the GameHub Lite card in Utility (or on the game page), then tap Use this folder on the page that opens. From then on, games you add in it show up in the Library and Play goes straight into the game |
| DroidDeck | Likewise, tap Allow once on the DroidDeck card or game page. Games added in DroidDeck start directly |
| WinNative | Only opens the app; pick the game inside it |
#Android games
Turn on Android games under Settings → Interface and the Library gets an Android tab. Press Start or tap Choose apps to add native games from your device, and start them alongside your emulator games.
#Floating button
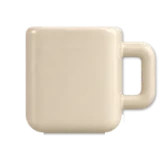
The floating button is the small translucent cup in the bottom-right corner while you play a RetroArch game. Tap it to quick save, change bezels and shaders, or save and quit, without memorising RetroArch's hotkeys.
#Turn it on
- Turn on Floating button next to Emulator on the game page (you can also add a Floating button tile to the pull-down Quick Settings).
- When asked, allow Tea to display over other apps.
- It needs the universal RetroArch (nightly), which is the version Utility installs. The stable RetroArch, the Play Store version and RetroArch G don't show the floating button.
The cup appears only when RetroArch can respond. It fades after a few seconds so it's less in the way; you can drag it around, and a long press hides it until the next game.
Note: with it on, RetroArch takes commands while a game runs; on a shared Wi-Fi, devices on the same network can send commands too. Take care on public networks.
#What's in the menu
On the left are this console's bezels and shaders; tap one to switch. Shaders change at once; changing the bezel reloads the game automatically, keeping your progress where possible.
Buttons on the right:
| Button | What it does |
|---|---|
| Hide | Close the menu |
| Save | Quick save to the current slot |
| Save+quit | Quick save, then quit RetroArch normally and return to Tea |
| Swap disc | Multi-disc games only: lists every disc, tap one to switch to it |
| RA menu | Open RetroArch's own menu |
| Quit | Quit normally without a quick save (in-game saves are kept as usual) |
With a few cores (such as YabaSanshiro for Saturn), quick saves crash RetroArch, so Save and Save+quit aren't available with those cores.
#Quitting properly
To keep your progress and let saves sync, quit with Save+quit, Quit, or Close Content in RetroArch's menu. Leaving with Home or swiping RetroArch away in recent apps doesn't count as a normal quit.
#Load the quick save at start
Settings → Emulator games → Load the quick save at start: with it on, RetroArch games load the latest quick save when they start, so you continue where you left off. Saves from Save+quit, Save and from other devices via sync all count. Standalone PPSSPP also loads slot 1.
- Whether a quick save is written automatically on exit is set in RetroArch: Settings → Saving → Auto Save State.
- No risk of loading an old save: if your Save+quit or Save progress is newer than the automatic quick save, the newer one is loaded.
- If you pick a disc at start for a multi-disc game, that run starts fresh from the chosen disc without loading a quick save.
Tip: when RetroArch's Run-Ahead is on for GBA to cut latency, Tea adjusts the settings automatically so in-game saves aren't lost.
#Play time
Games started from Tea are timed automatically; game tiles, lists and the game page show something like "Played 3h 12m". Games you've played appear in Recently played. With sync on, play time follows you to your other devices.
#What's different on the Steam Deck
The Steam Deck edition uses ES-DE's emulator settings (found automatically if EmuDeck is installed). In a game, press L4 + R4 to open the quick menu instead of the floating button; without EmuDeck, hold Select + Start to quit a game. See Steam Deck.